Placeholder views for iOS
When you're working on a new app, sometimes it's easier to start with dummy views and slowly replace them as you implement their functionality. Rather than use a simple UIView for this, PAPlaceholder gives you a better looking placeholder view that shows its dimensions and an optional title.
It also provides a dummy view controller which automatically creates the placeholder view. This is useful when you're using a view controller container such as a UITabBarController or a UISplitViewController.
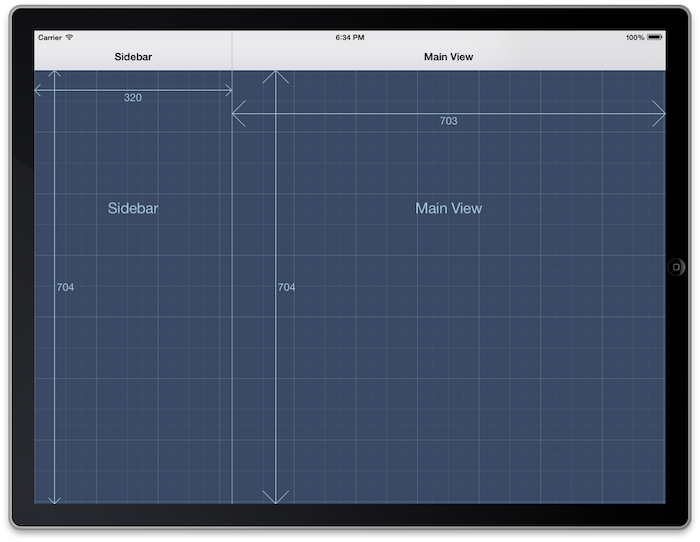
Using this at the early stages of a project are particularly useful on iOS 7, where many of the system views (like the navigation bar or tab bar) are actually transparent and the content views extend behind them. The arrows on the PAPlaceholderView show the edges of the view so you can tell if the edges are where you expect them to be.
The source of PAPlaceholder is on github at https://github.com/dhennessy/PAPlaceholder
Adding PAPlaceholder to your project
The simplest way to add PAPlaceholder to your project is to use CocoaPods. Just add the following line to your Podfile:
pod 'PAPlaceholder'
If you'd prefer to manually integrate it, simply copy PAPlaceholder/*.{m,h} into your project.
Creating a placeholder view in code
You can use PAPlaceholderView anywhere you could have used UIView. For example in loadView:
- (void)loadView {
    self.view = [[PAPlaceholderView alloc] initWithFrame:[UIScreen mainScreen].bounds];
}
Creating a placeholder view in a storyboard or XIB
Simply drag a UIView onto your view and then change its class to PAPlaceholderView. Or drag on a UIViewController and change its class to PAPlaceholderViewController.
The included example project demonstrates this in a storyboard.
Published on Jan 2, 2014© Copyright 2009-2019 Peer Assembly Ltd.